Lessons in Photogrammetry
Structure from motion (sfm) photogrammetry is a technology that generates 3d models from 2d images. Photogrammetry programs analyze a series of images to identify features and key points across images to estimate measurements, form, and size. Photogrammetry is a useful tool to archaeologists, because by digitizing archaeological sites and artifacts they become accessible to the public and for continued research. As the next best option to a tactile archaeological experience, it can mitigate physical or monetary barriers and reduce handling of artifacts. Since photogrammetry can generate landscapes, archaeologists have also used it to create models of sunken ships or the preservation of cultural heritage sites threatened, or submerged, by climate change.
My hope for photogrammetry at Strawbery Banke Museum is that it can become a tool to expand public knowledge about archaeology and our methods of knowing. Since it is uncommon to recover a completely intact artifact, few end up in furnished houses or exhibits at the museum. By integrating photogrammetry into the museum's story of the Yeaton-Walsh House, visitors might interact with and experience an artifact in a way that only the Welches and those in the Carter Center have. We can show how we know what we know, whether displaying the makers marks from bottoms of ceramics or the mending of a vessel from many individually labeled sherds.
To do your own photogrammetry at home, all you need is a camera and a laptop to download the software onto. I use two programs: Agisoft Metashape and 3DF Zephyr. Archaeologists appear to favor Agisoft, likely for its high processing power and ability to identify and render about 50,000 key points per image. Zephyr is a free program, which limits you to 50 photos. It can take around two to three hours to edit and complete a model using standard settings.
I created my first models using my cellphone camera, some embroidery thread, and a pizza pan. In the lab, I have the advantage of working with a Nikon camera, tripod, lucite stands, turntable, and Orangemonkie lightbox.

The first step is to take images of an object from many staggered angles. I have two strategies for this depending on the form of the artifact. The following artifacts are from a pearlware tea set recovered from Yeaton-Walsh. (For more information on the artifact, you can select the “George Phillips 'Canova' tea service” tag in this timeline: https://time.graphics/line/675651.)

For the shallower saucer, I did a 360 of the artifact for all 50 photos. For the teacup, with more depth and decorations on the inside and outside, I took one set of photos in a circle level with the object, another set from higher-up where both the inside and outside were visible, and one set in an “X” shaped crossover. Each photo should overlap with the last photo by about 50%.
View the 3d models:
Step 1: Sparse Point Cloud

Step 2: Dense Point Cloud
The dense point cloud builds depth and color. Here, the subject of the model is more discernible.

Step 3: Mesh
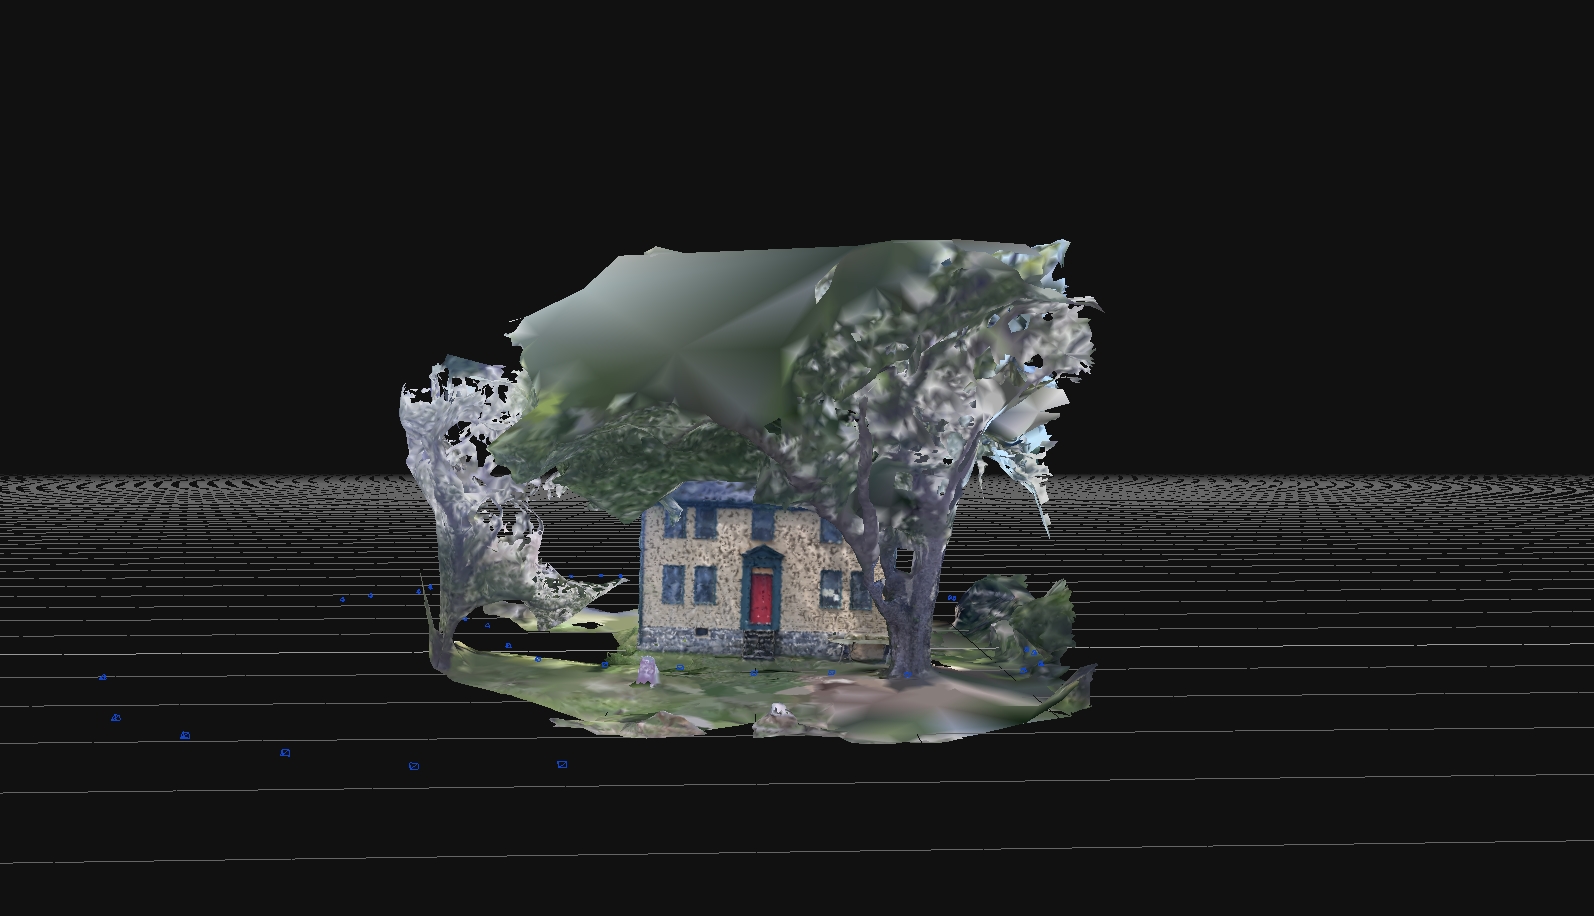
A mesh is a polygonal model generated from the dense point cloud’s depth map. In Zephyr, the mesh is created using triangles. This model has a lot of noise, predominantly from attempts to render the sky and trees in this instance, meaning that there are many points in the rendering that are unwanted. At this stage of the process, I edit the mesh to remove noise, as well as fill holes and apply smoothing filters, reduce or increase polygons, and generally clean up the model. I usually make between 4 and 6 meshes.
Step 4: Textured Mesh
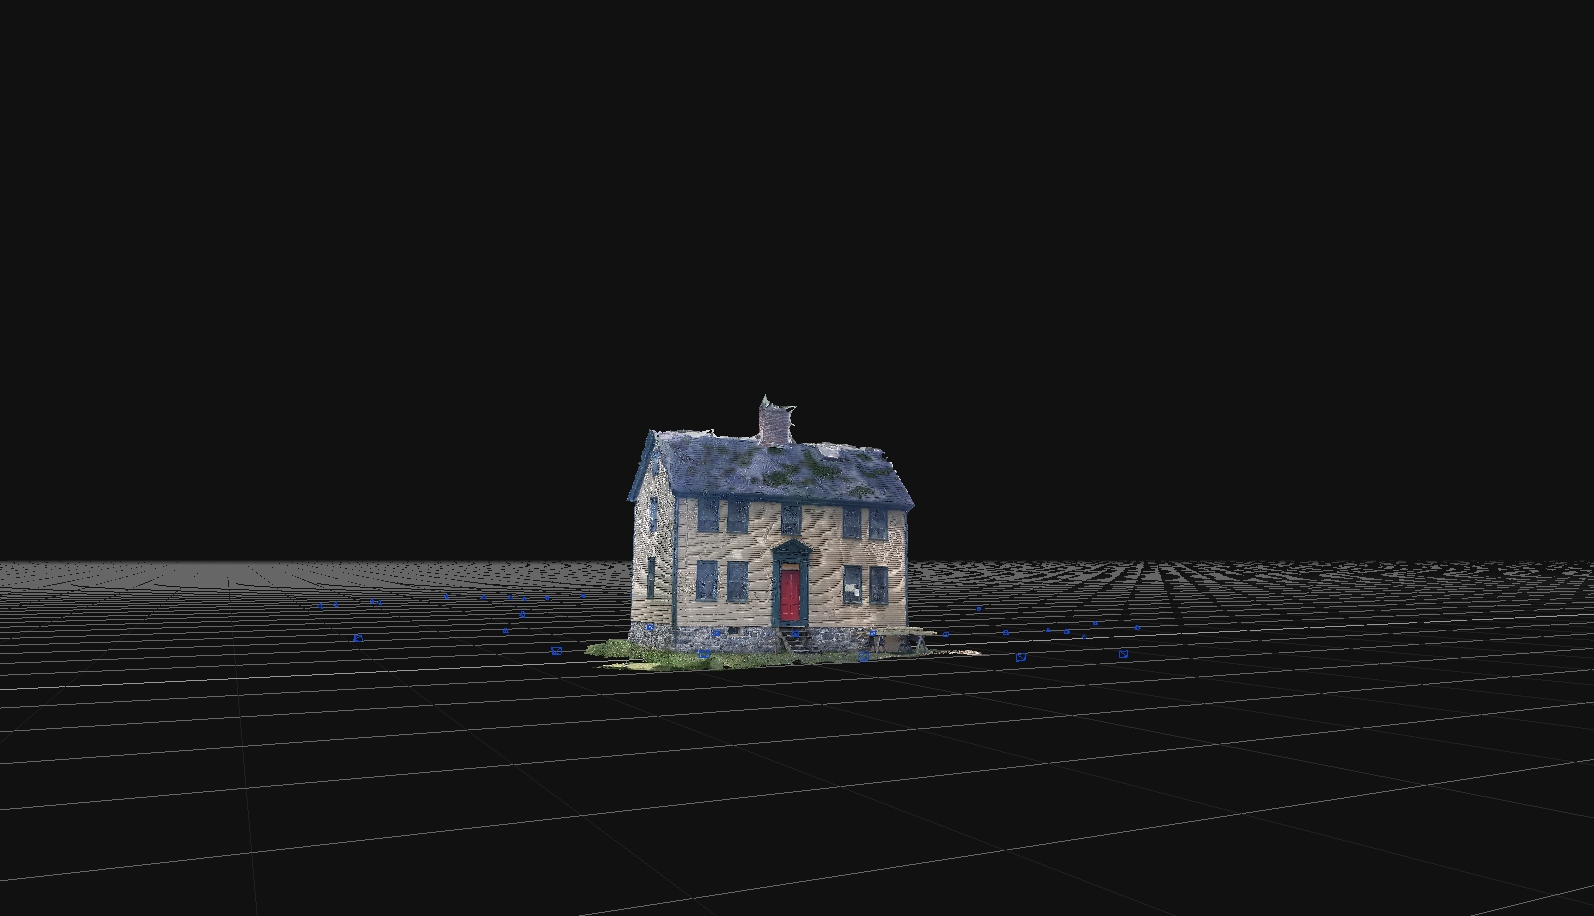
The final step is the textured mesh, or 3d model. This is a rough model I produced to demonstrate the process, where you can see the shadow of leaves from a tree projected onto the side of the house and some warping. Since it is a house photographed outside, versus a teacup that can fit into your hand, the size and detail is greatly different.
Final model:
Comments
Post a Comment